1/48 Republic XF-103 Thunderwarrior- projekt*
Moderatorzy: kartonwork, Rafal N.
1/48 Republic XF-103 Thunderwarrior- projekt*
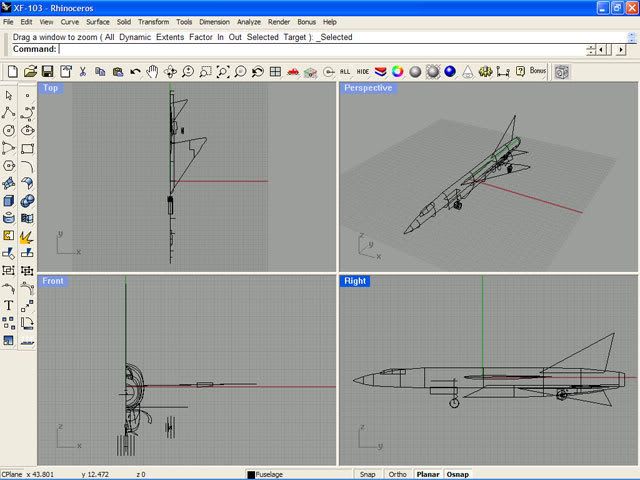
Now I begin next project with 1/48 Republic XF-103 Thunderwarrior...all necessary line is drew on Rhino ready to make surface. Progress next
Best Regards
NOBI
"If the model turns into a failure -- immediately tell everyone it's a prototype"
Visit Thaipaperwork at
http://thaipaperwork.com
Visit Thaipaperwork's Blog at
http://thaipaperwork.blogspot.com/
NOBI
"If the model turns into a failure -- immediately tell everyone it's a prototype"
Visit Thaipaperwork at
http://thaipaperwork.com
Visit Thaipaperwork's Blog at
http://thaipaperwork.blogspot.com/
Hi There,
Update progress about something like canopy on top of model...first i dont know what is it. I think that should be some hole to let pilot see what is in front of aircraft...too small to be a canopy. I add it because of picture of finish model (in plastics) at http://features02.kitparade.com/xf103pb_1.htm have this thing too thank you very much for all advise
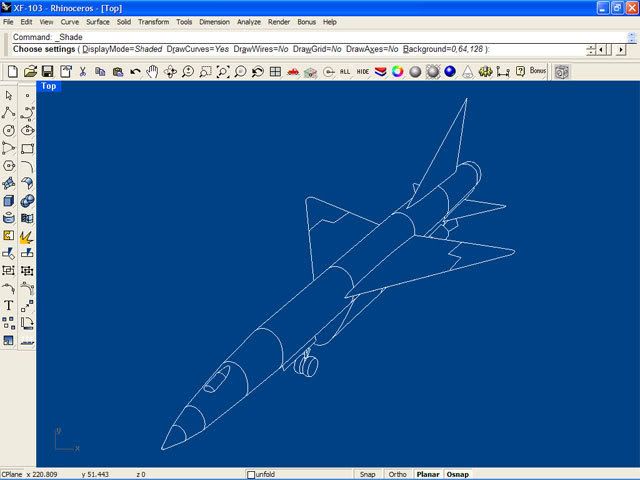
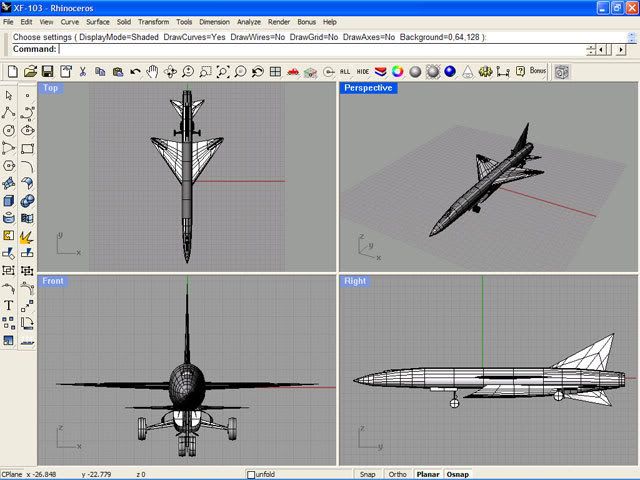
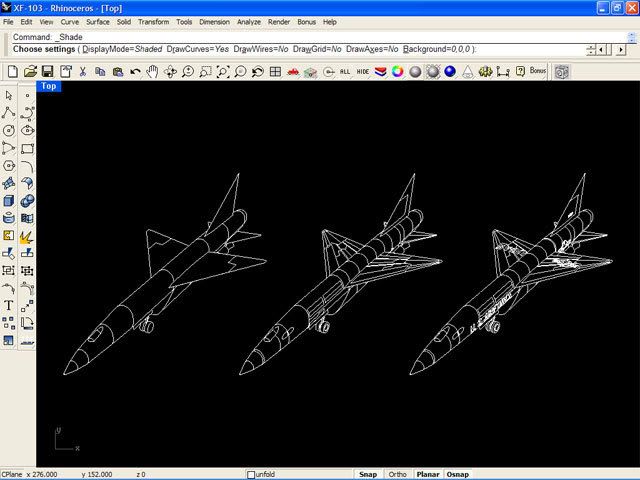
let's see model when finish making surface below strange looking craft, i think
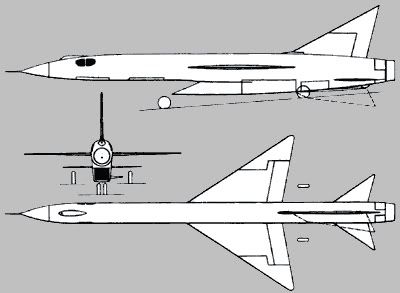
and below is 3 views drawing i have... no cross section make me hard to make a mesh
Update progress
let's see model when finish making surface below
and below is 3 views drawing i have... no cross section make me hard to make a mesh
Best Regards
NOBI
"If the model turns into a failure -- immediately tell everyone it's a prototype"
Visit Thaipaperwork at
http://thaipaperwork.com
Visit Thaipaperwork's Blog at
http://thaipaperwork.blogspot.com/
NOBI
"If the model turns into a failure -- immediately tell everyone it's a prototype"
Visit Thaipaperwork at
http://thaipaperwork.com
Visit Thaipaperwork's Blog at
http://thaipaperwork.blogspot.com/
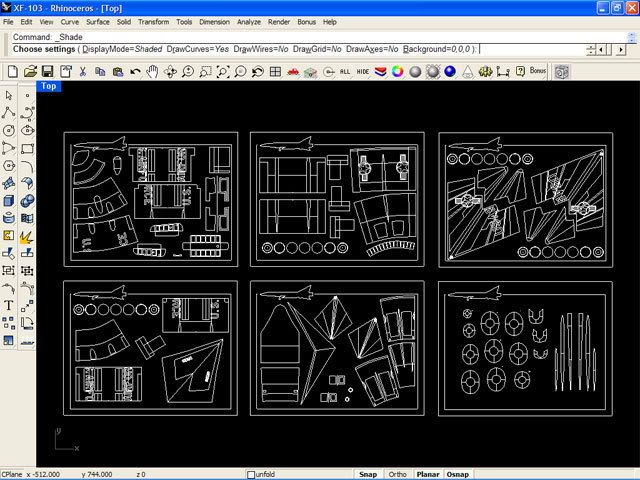
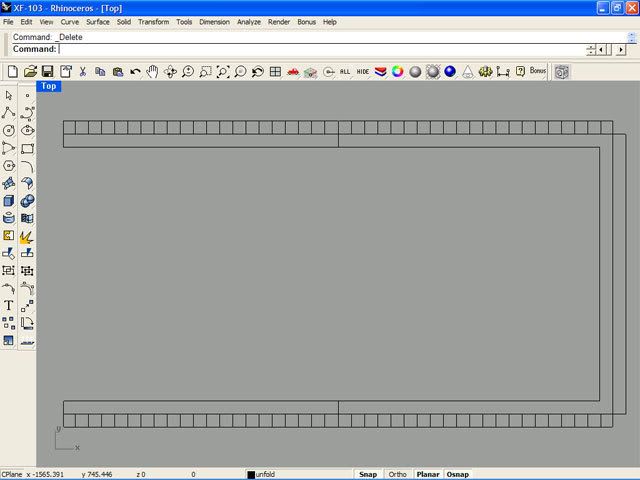
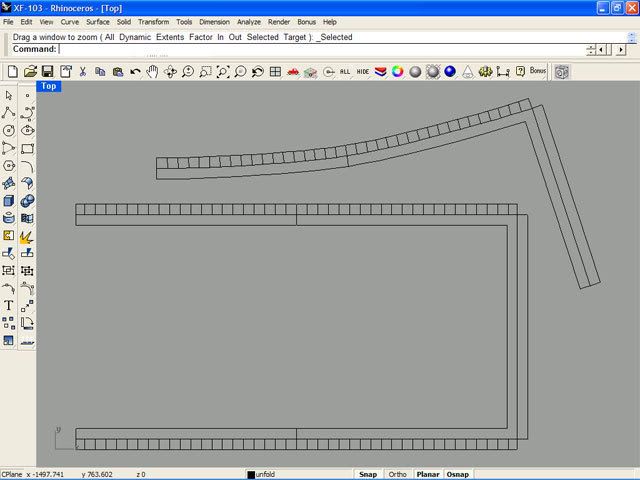
Tonight I add all of panel line into surface...only decal left and then unfold

Best Regards
NOBI
"If the model turns into a failure -- immediately tell everyone it's a prototype"
Visit Thaipaperwork at
http://thaipaperwork.com
Visit Thaipaperwork's Blog at
http://thaipaperwork.blogspot.com/
NOBI
"If the model turns into a failure -- immediately tell everyone it's a prototype"
Visit Thaipaperwork at
http://thaipaperwork.com
Visit Thaipaperwork's Blog at
http://thaipaperwork.blogspot.com/
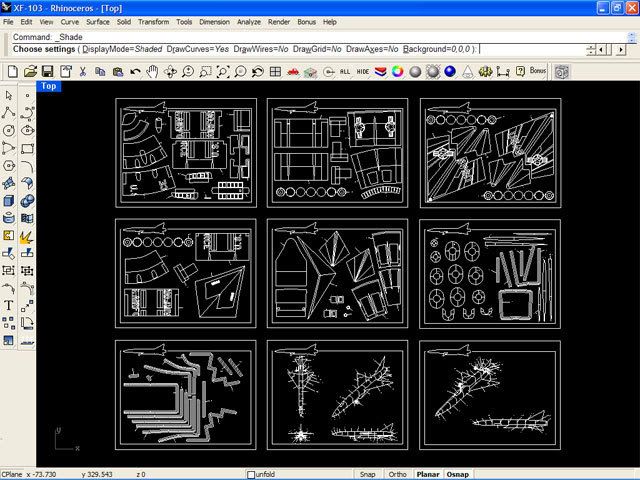
A little bit progress with decal on mesh

and compare 3 steps before unfold
and compare 3 steps before unfold
Best Regards
NOBI
"If the model turns into a failure -- immediately tell everyone it's a prototype"
Visit Thaipaperwork at
http://thaipaperwork.com
Visit Thaipaperwork's Blog at
http://thaipaperwork.blogspot.com/
NOBI
"If the model turns into a failure -- immediately tell everyone it's a prototype"
Visit Thaipaperwork at
http://thaipaperwork.com
Visit Thaipaperwork's Blog at
http://thaipaperwork.blogspot.com/
Unfold nearly finish...post some progress first... only internal former and connection strip left

Best Regards
NOBI
"If the model turns into a failure -- immediately tell everyone it's a prototype"
Visit Thaipaperwork at
http://thaipaperwork.com
Visit Thaipaperwork's Blog at
http://thaipaperwork.blogspot.com/
NOBI
"If the model turns into a failure -- immediately tell everyone it's a prototype"
Visit Thaipaperwork at
http://thaipaperwork.com
Visit Thaipaperwork's Blog at
http://thaipaperwork.blogspot.com/
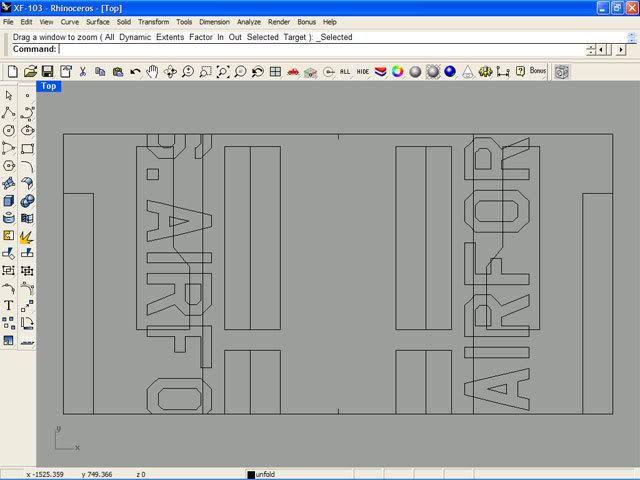
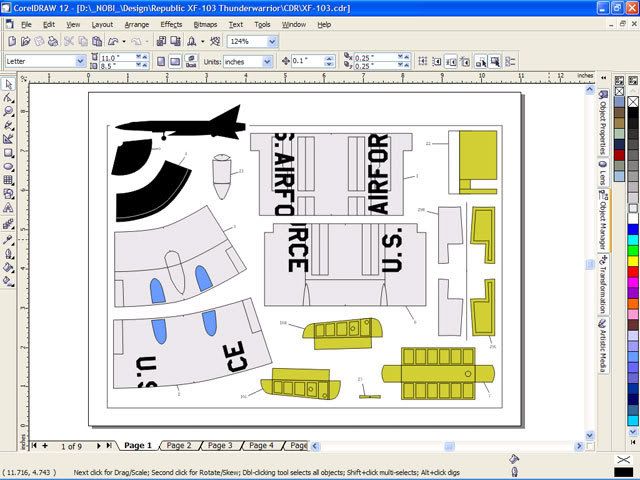
Update today :-) all parts arrange on letter size page. Only Connection strip left. I will post how to make connection strip from Rhino for people who interest too :-)
Best Regards
NOBI
"If the model turns into a failure -- immediately tell everyone it's a prototype"
Visit Thaipaperwork at
http://thaipaperwork.com
Visit Thaipaperwork's Blog at
http://thaipaperwork.blogspot.com/
NOBI
"If the model turns into a failure -- immediately tell everyone it's a prototype"
Visit Thaipaperwork at
http://thaipaperwork.com
Visit Thaipaperwork's Blog at
http://thaipaperwork.blogspot.com/

I use unrollsrf function to unwrap mesh, you can access to this function at surface > unroll Developable srf
about tutorial...i will explain how to make connection strip for my design. just a simple method and hope that my technics will helpful for modeler
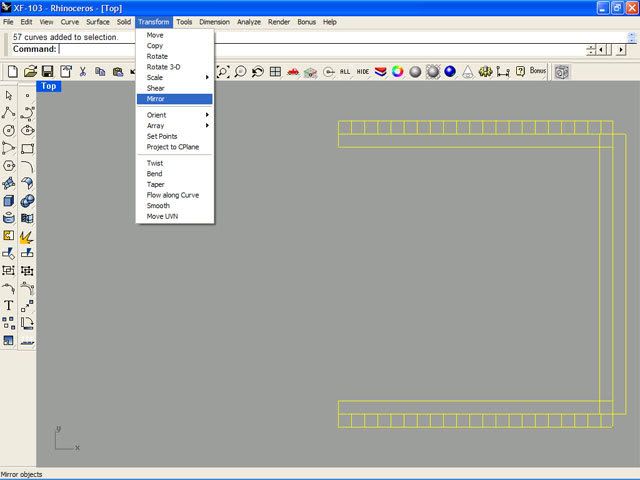
first at all choose your part what you want to make strip like below
after that remove panel line and decal you draw out from part
then use only half of part to do a strip, because this is symmetry part

select a polyline what you want to have a strip in there and use offset curve function from curve > offset curve
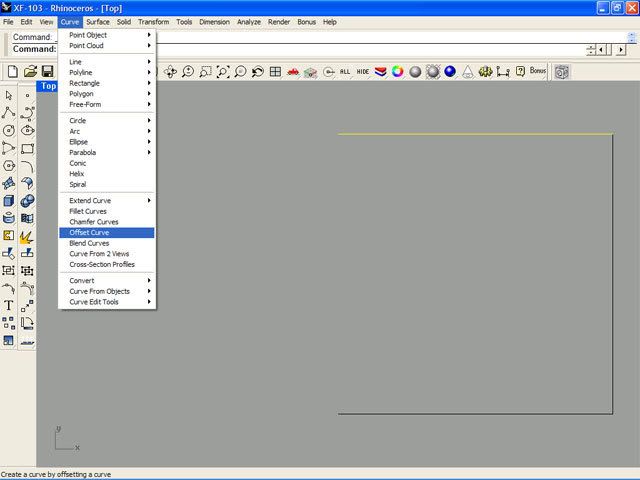
i decide to use 5 mm strip for my model so i will offset polyline to 2.5 mm. each side
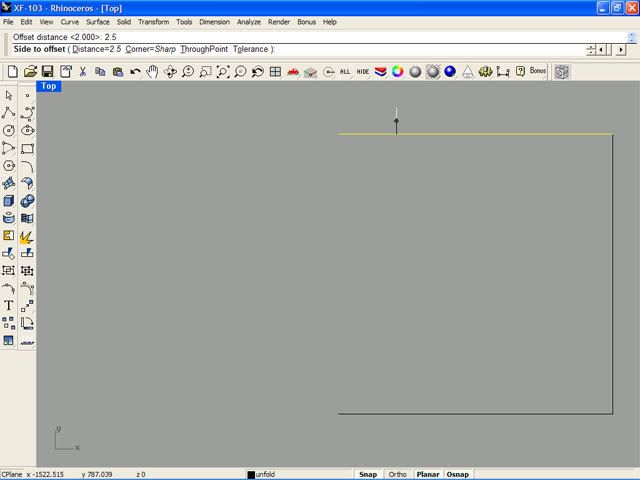

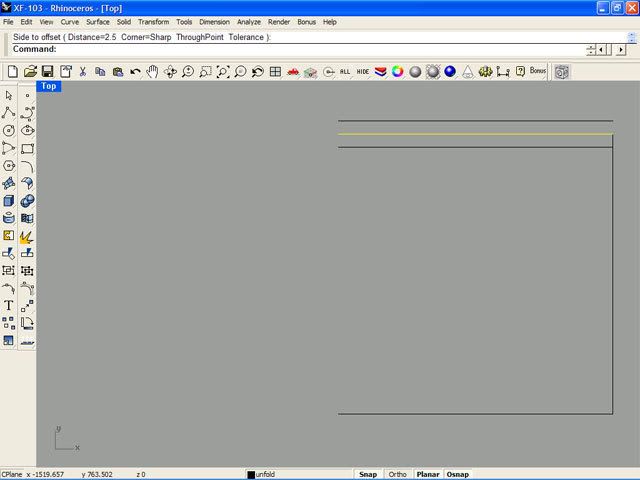
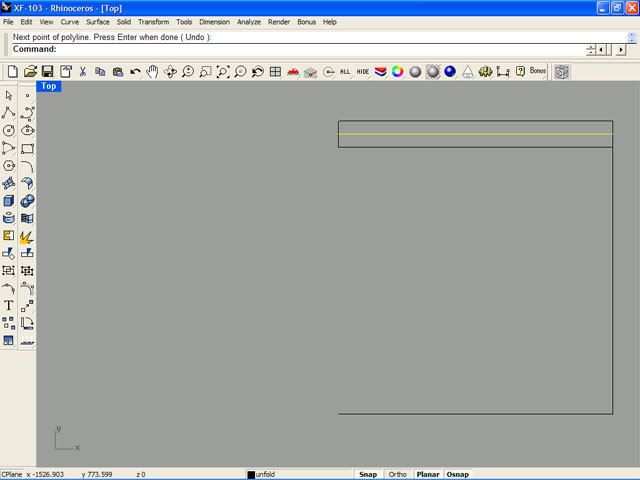
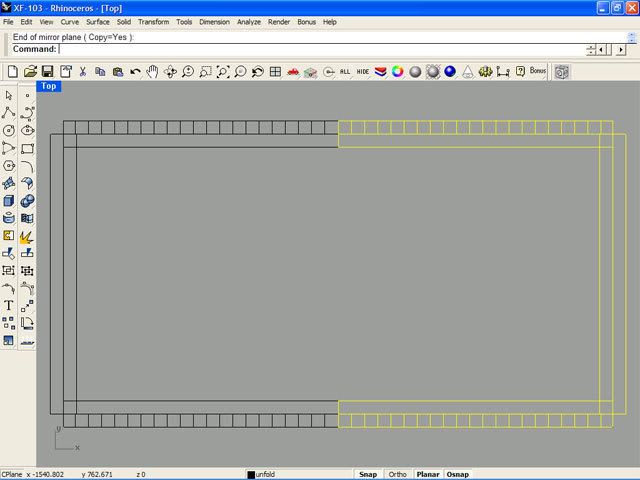
then draw a polyline to close all open shape
select polyline as show in picture below then use function array along curve from transform > array > array along curve
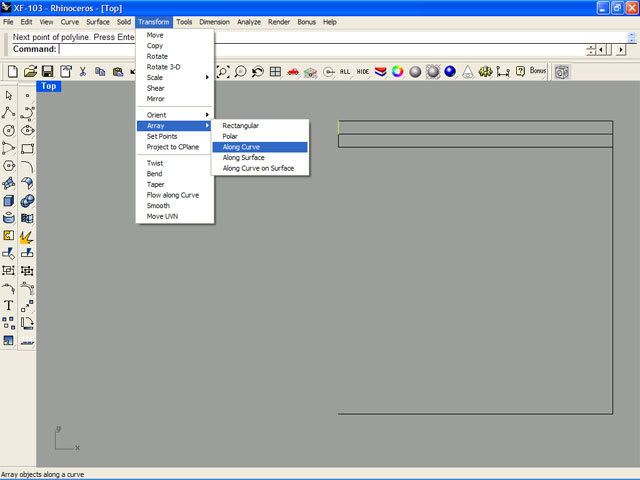
choose Distance between Item option and type 2.5 inside a box press ok
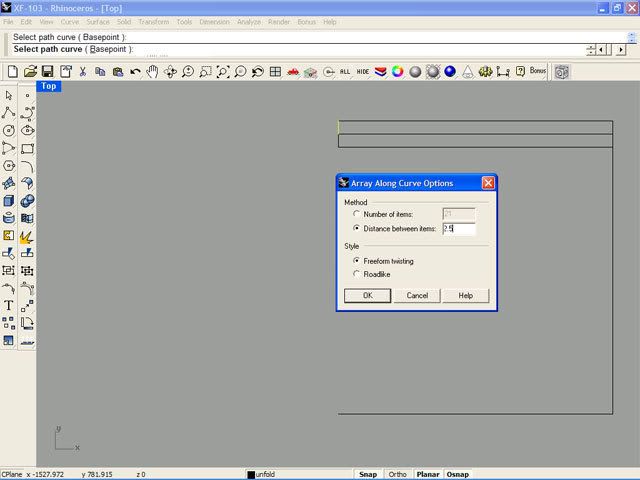
you will get a polyline along curve with 2.5 mm distance each line
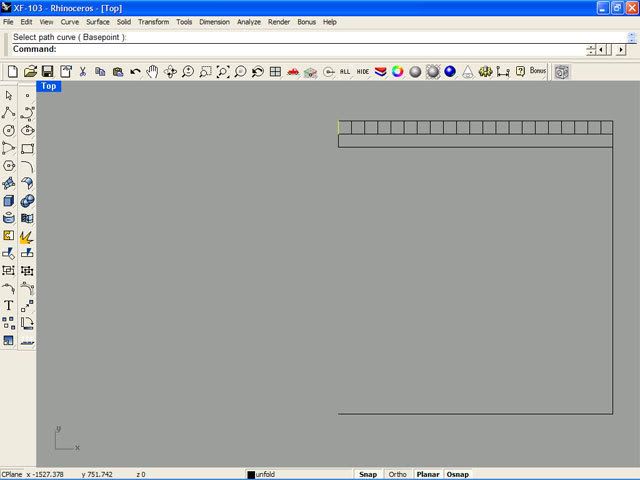
offset side curve as below with 2.5 mm. distance

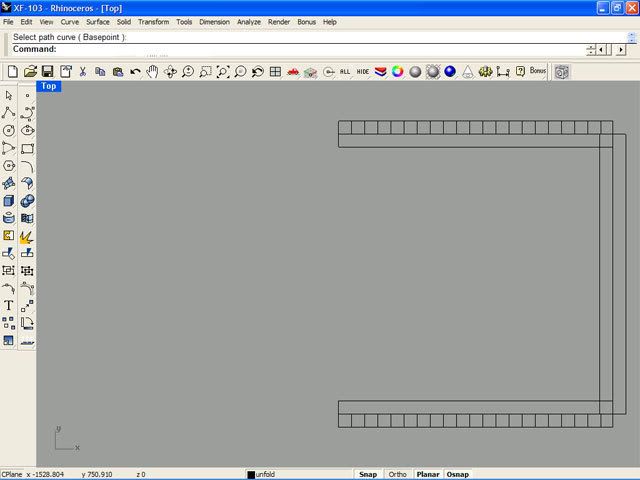
draw a polyline to close all open shape

make a strip in another side of part
select all line and mirror it
this is what you get
trim all no need line
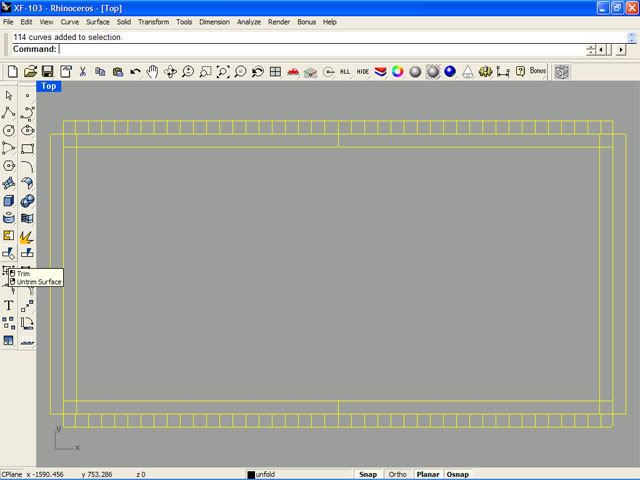
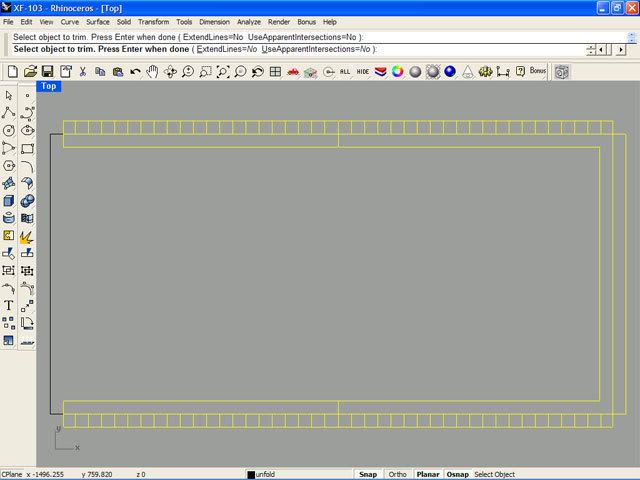
you will get a U type strip
and you can make L type strip too
apologized for my poor English but i think pictures will explain all i want to say
about tutorial...i will explain how to make connection strip for my design. just a simple method and hope that my technics will helpful for modeler
first at all choose your part what you want to make strip like below
after that remove panel line and decal you draw out from part
then use only half of part to do a strip, because this is symmetry part
select a polyline what you want to have a strip in there and use offset curve function from curve > offset curve
i decide to use 5 mm strip for my model so i will offset polyline to 2.5 mm. each side
then draw a polyline to close all open shape
select polyline as show in picture below then use function array along curve from transform > array > array along curve
choose Distance between Item option and type 2.5 inside a box press ok
you will get a polyline along curve with 2.5 mm distance each line
offset side curve as below with 2.5 mm. distance
draw a polyline to close all open shape
make a strip in another side of part
select all line and mirror it
this is what you get
trim all no need line
you will get a U type strip
and you can make L type strip too
apologized for my poor English but i think pictures will explain all i want to say
Best Regards
NOBI
"If the model turns into a failure -- immediately tell everyone it's a prototype"
Visit Thaipaperwork at
http://thaipaperwork.com
Visit Thaipaperwork's Blog at
http://thaipaperwork.blogspot.com/
NOBI
"If the model turns into a failure -- immediately tell everyone it's a prototype"
Visit Thaipaperwork at
http://thaipaperwork.com
Visit Thaipaperwork's Blog at
http://thaipaperwork.blogspot.com/
Another progress... label and instruction is finish...can't wait to color her
Best Regards
NOBI
"If the model turns into a failure -- immediately tell everyone it's a prototype"
Visit Thaipaperwork at
http://thaipaperwork.com
Visit Thaipaperwork's Blog at
http://thaipaperwork.blogspot.com/
NOBI
"If the model turns into a failure -- immediately tell everyone it's a prototype"
Visit Thaipaperwork at
http://thaipaperwork.com
Visit Thaipaperwork's Blog at
http://thaipaperwork.blogspot.com/
coloring start...not finish yet but test build soon
Best Regards
NOBI
"If the model turns into a failure -- immediately tell everyone it's a prototype"
Visit Thaipaperwork at
http://thaipaperwork.com
Visit Thaipaperwork's Blog at
http://thaipaperwork.blogspot.com/
NOBI
"If the model turns into a failure -- immediately tell everyone it's a prototype"
Visit Thaipaperwork at
http://thaipaperwork.com
Visit Thaipaperwork's Blog at
http://thaipaperwork.blogspot.com/